News
Old School Airbrush Drawings 1960s - Late 1990s
Before there were photo editing applications with airbrush features, artists like Joe and Mike Fernandez created drawings with sketchpads, tracing paper, pencils, pens, T-squares, triangles, curves, paintbrushes, rubber cement, thinner, airbrushes, ink, water, ink wash, finely tuned airbrushes, an air compressor, air pressure gauges, scratchboard, scraping tools, X-Acto knives, and lots of time. Each drawing, from conceptual sketches to the finished drawing, usually took several weeks to complete. This photo essay shows how hundreds of these drawings were created.
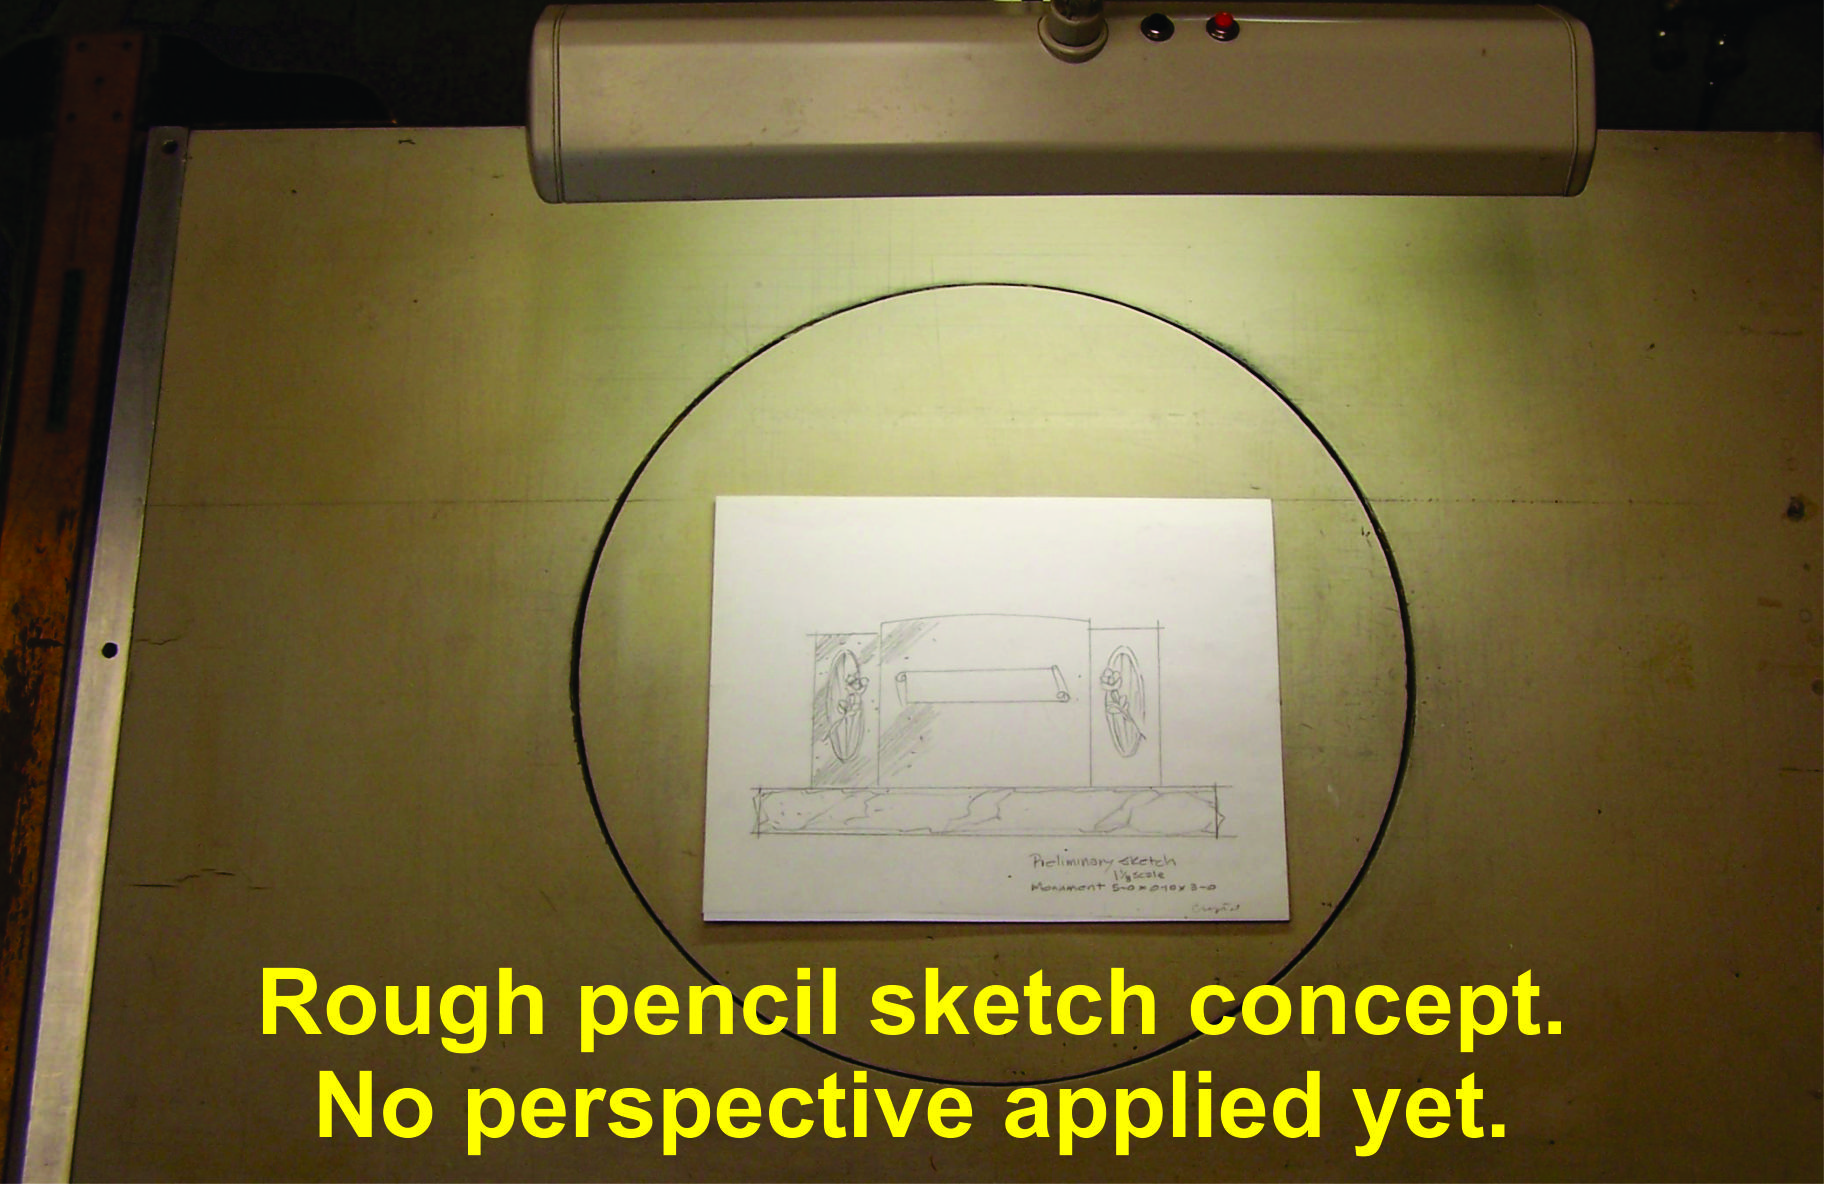
Each published design was the result of a dozen or more sketches. Sketches were evaluated, combined, and refined until a final sketch was on the board. Each drawing was created with harmony, balance, proportion, and symmetry (or asymmetry).
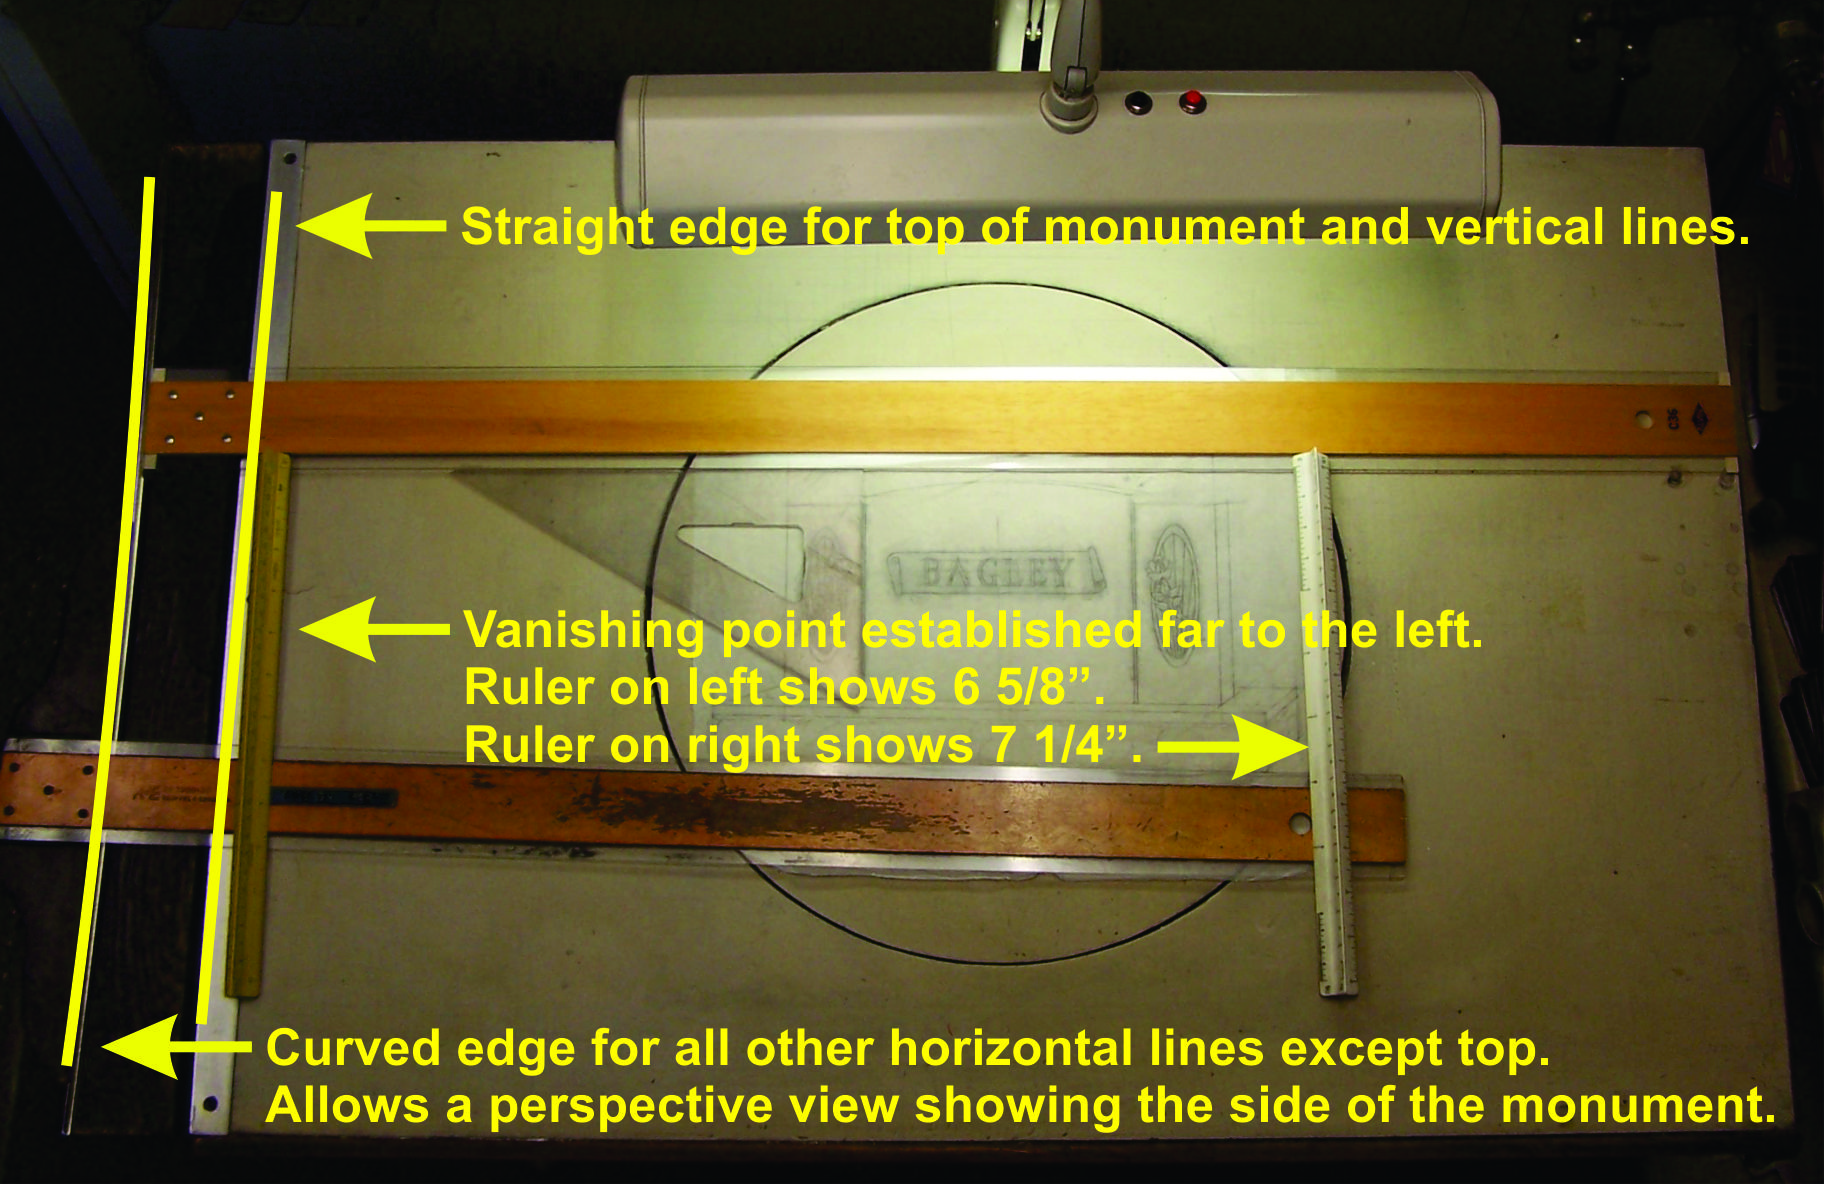
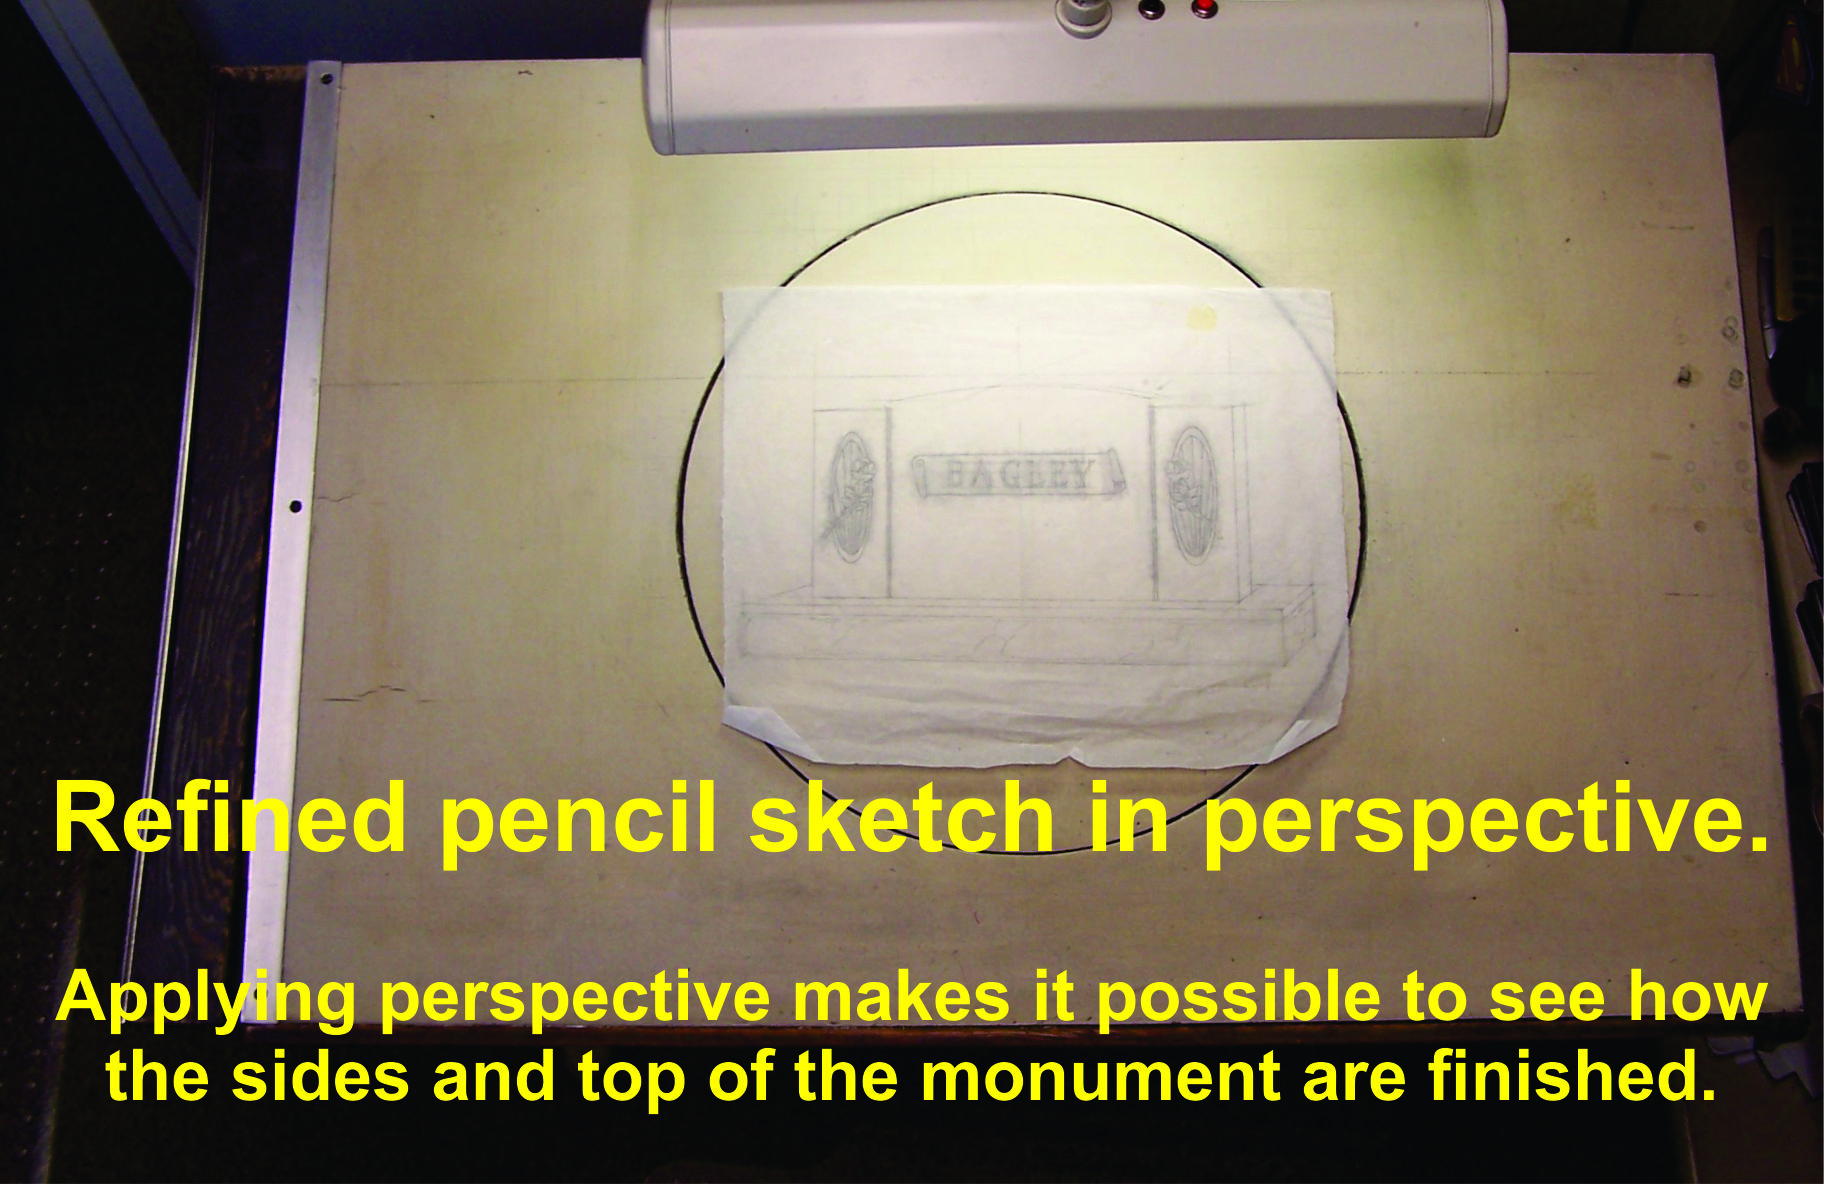
Design Mart designs are drawn in perspective...even with our new Online Monument Designer. Many old school artists, and many digital applications only show the front of the monument. It's much easier to do it that way, but a family purchasing a monument needs to see the side and top of the monument. The sides and top may be rock pitch (hewn), sawed, or polished. The family needs to know how their loved one's monument will really look from all angles. Since the side is shown, the drawing must be in perspective. In the same way that the lines on a highway vanish in the distance, a monument has a vanishing point. When viewed from the right, the vanishing point is to the left. A specially made, curved piece on the left side of the drawing board helps establish the position of a T-square to create a proper vanishing point.
This is the last time the sketch will be used. A pencil will be used to apply a fine coat of graphite to the back of the drawing. Next it will be placed onto a piece of scratchboard. This is a piece of card stock or thick paper with a layer of chalk over it. This layer allows ink to be scratched off to create white highlights or correct errors.
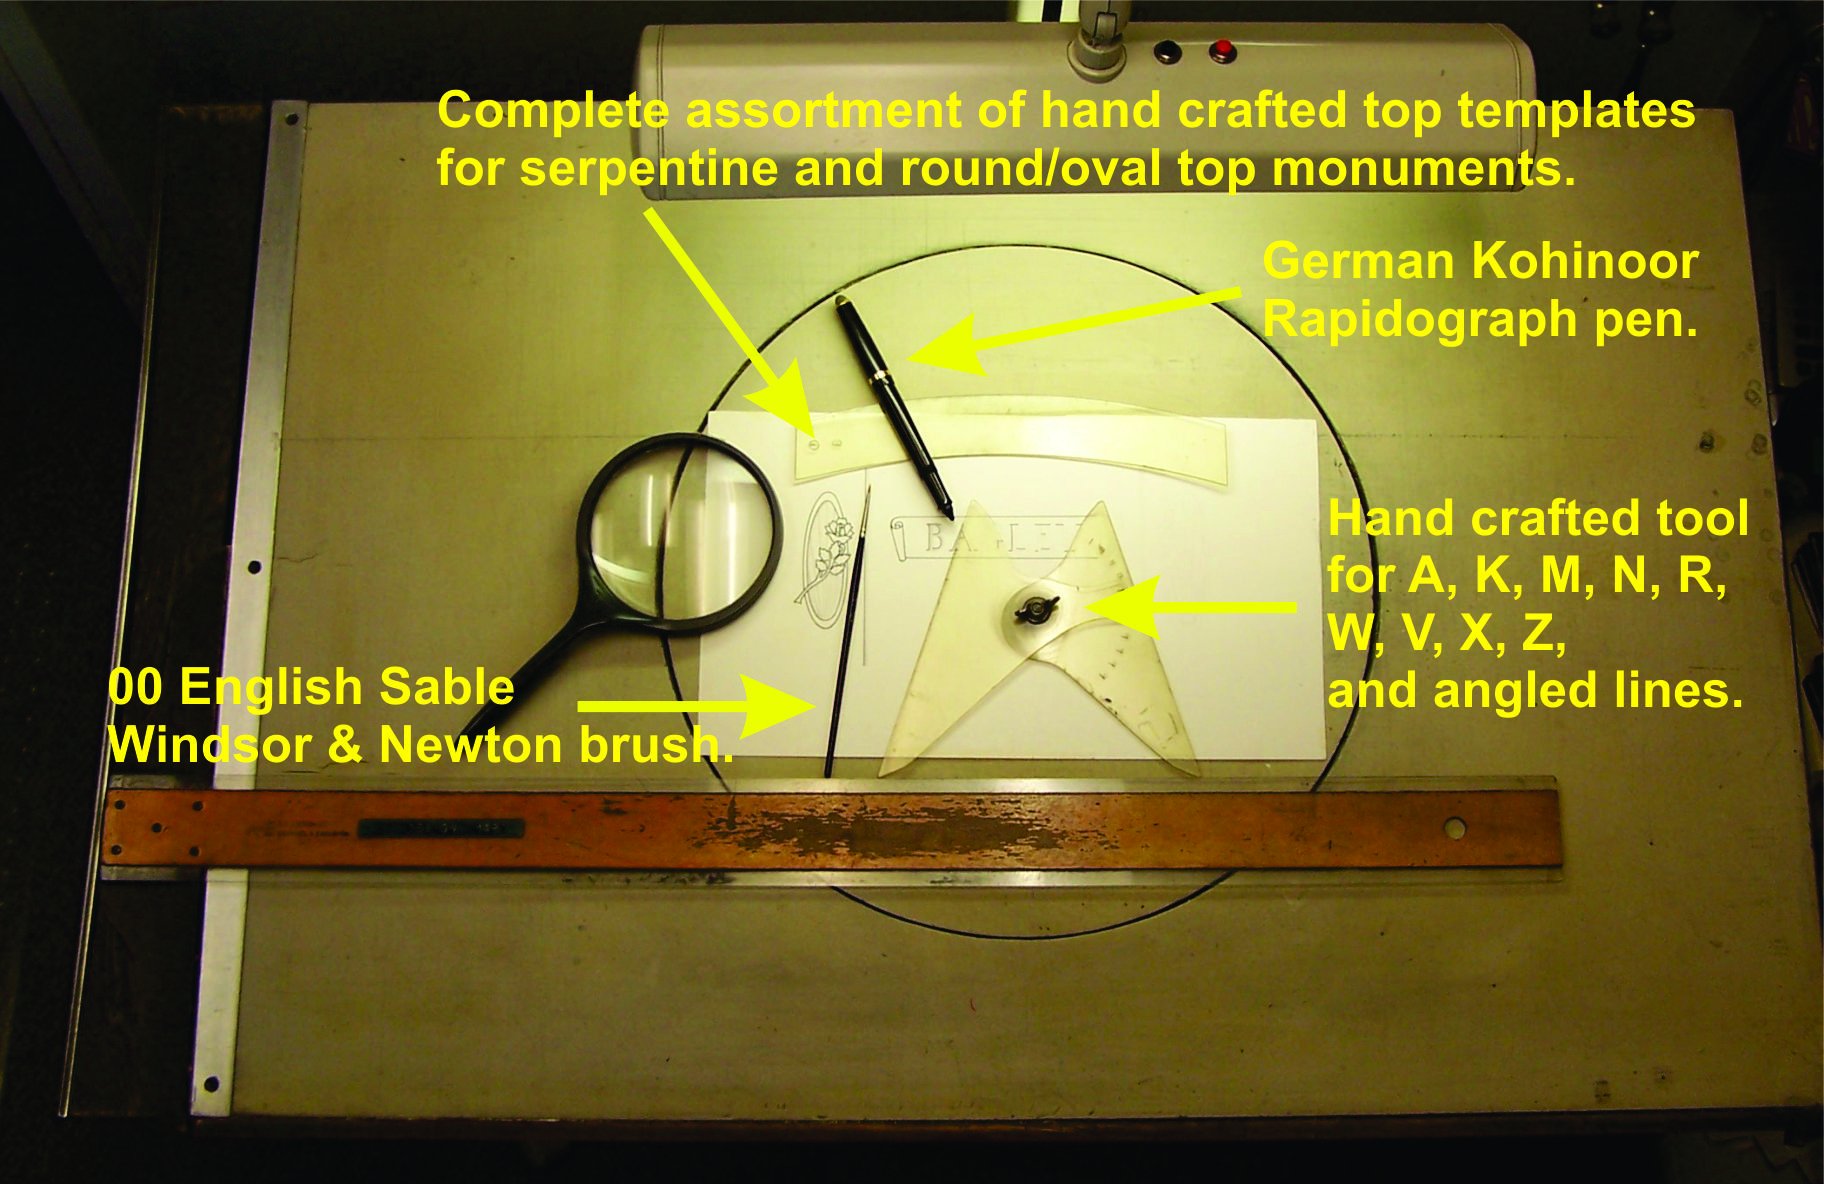
A handmade tool with a wing-nut allows the artist to draw all angled lines on letters at the same angle. Trying to hand draw two Ws with exactly the same angle without this tool would be nearly impossible. There are also many templates for the tops of the serpentine and rounded top monuments. From this stage on, no more pencils will be used. Everything is done with ink, and mistakes can result in lost time or a complete restart of a drawing. This tool is also used to taper the sides of the monument. Before the 1980s, the sides of monuments were tapered, making them narrower at the top. This gave monuments a more pleasing appearance to the eye as viewed by a visitor standing near the monument in the cemetery. A monument with straight sides would look top heavy if the sides were cut at 90 degree angles to the bottom of the monument. Think of holding a book in front of yourself and looking at the edge of the book. The edge closest to you will look larger than the edge that is farther away. In the 1980s and 90s more computer operated saws took over the operation of cutting a monument shape, and 90 degree (straight) sides were easier and faster to set up.
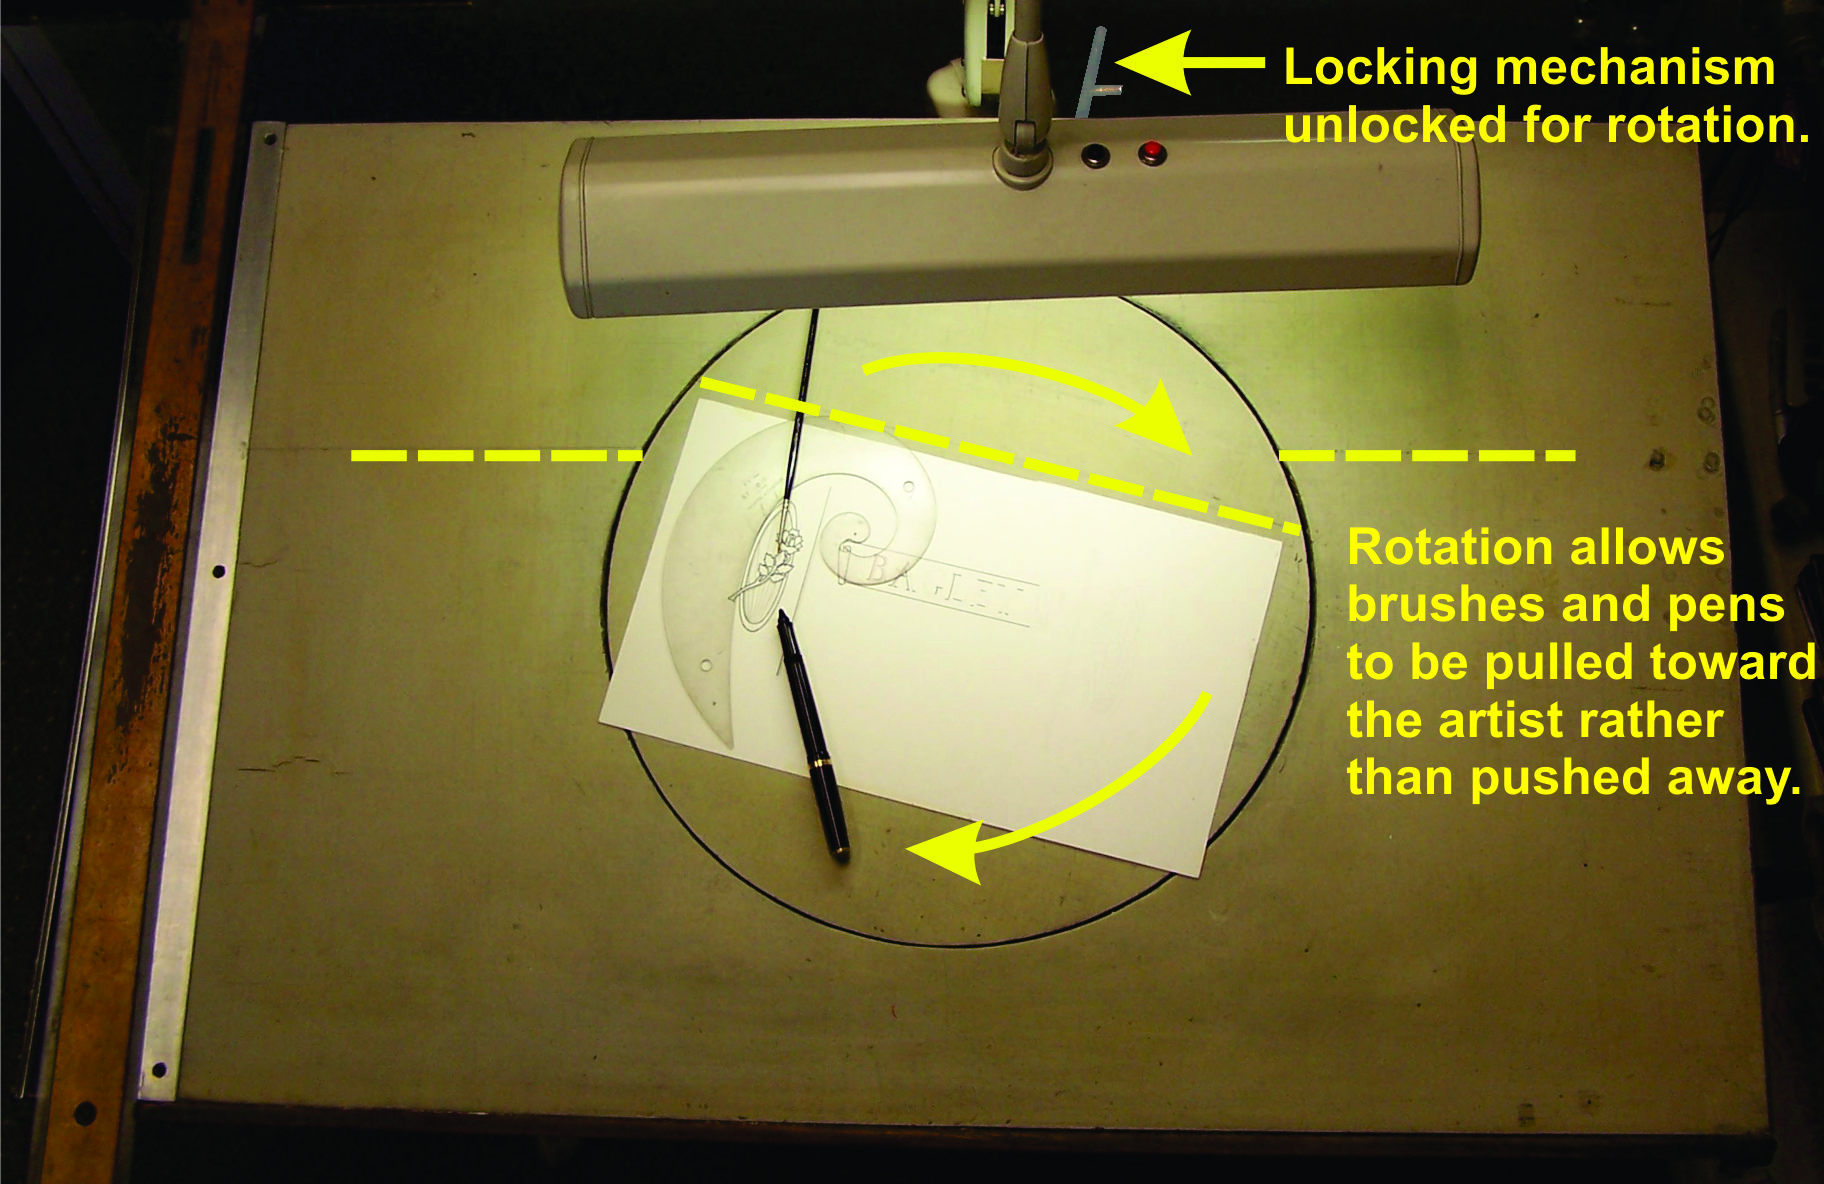
Think for a moment about painting or drawing. We pull pens, pencils and brushes toward us. We rarely push them. We have more control and visibility when pulling toward ourselves. This one-of-a-kind drawing board was built by Joe Fernandez. A locking mechanism at the top prevents rotation and locks in at true horizontal. Releasing the lock allows free rotation so brushes can be pulled toward the artist regardless of the direction of the line. The locking mechanism can prevent rotation while working or may be completely unlocked to allow free rotation.

Masks must be created before airbrushing can begin. A new piece of tracing paper is selected, and a thinned rubber cement coating is applied to the back. Full strength rubber cement would cause the mask to pull ink from the scratchboard when the masks are removed. Tracing paper allows the artist to see the ink lines through the paper and cut an accurate mask.
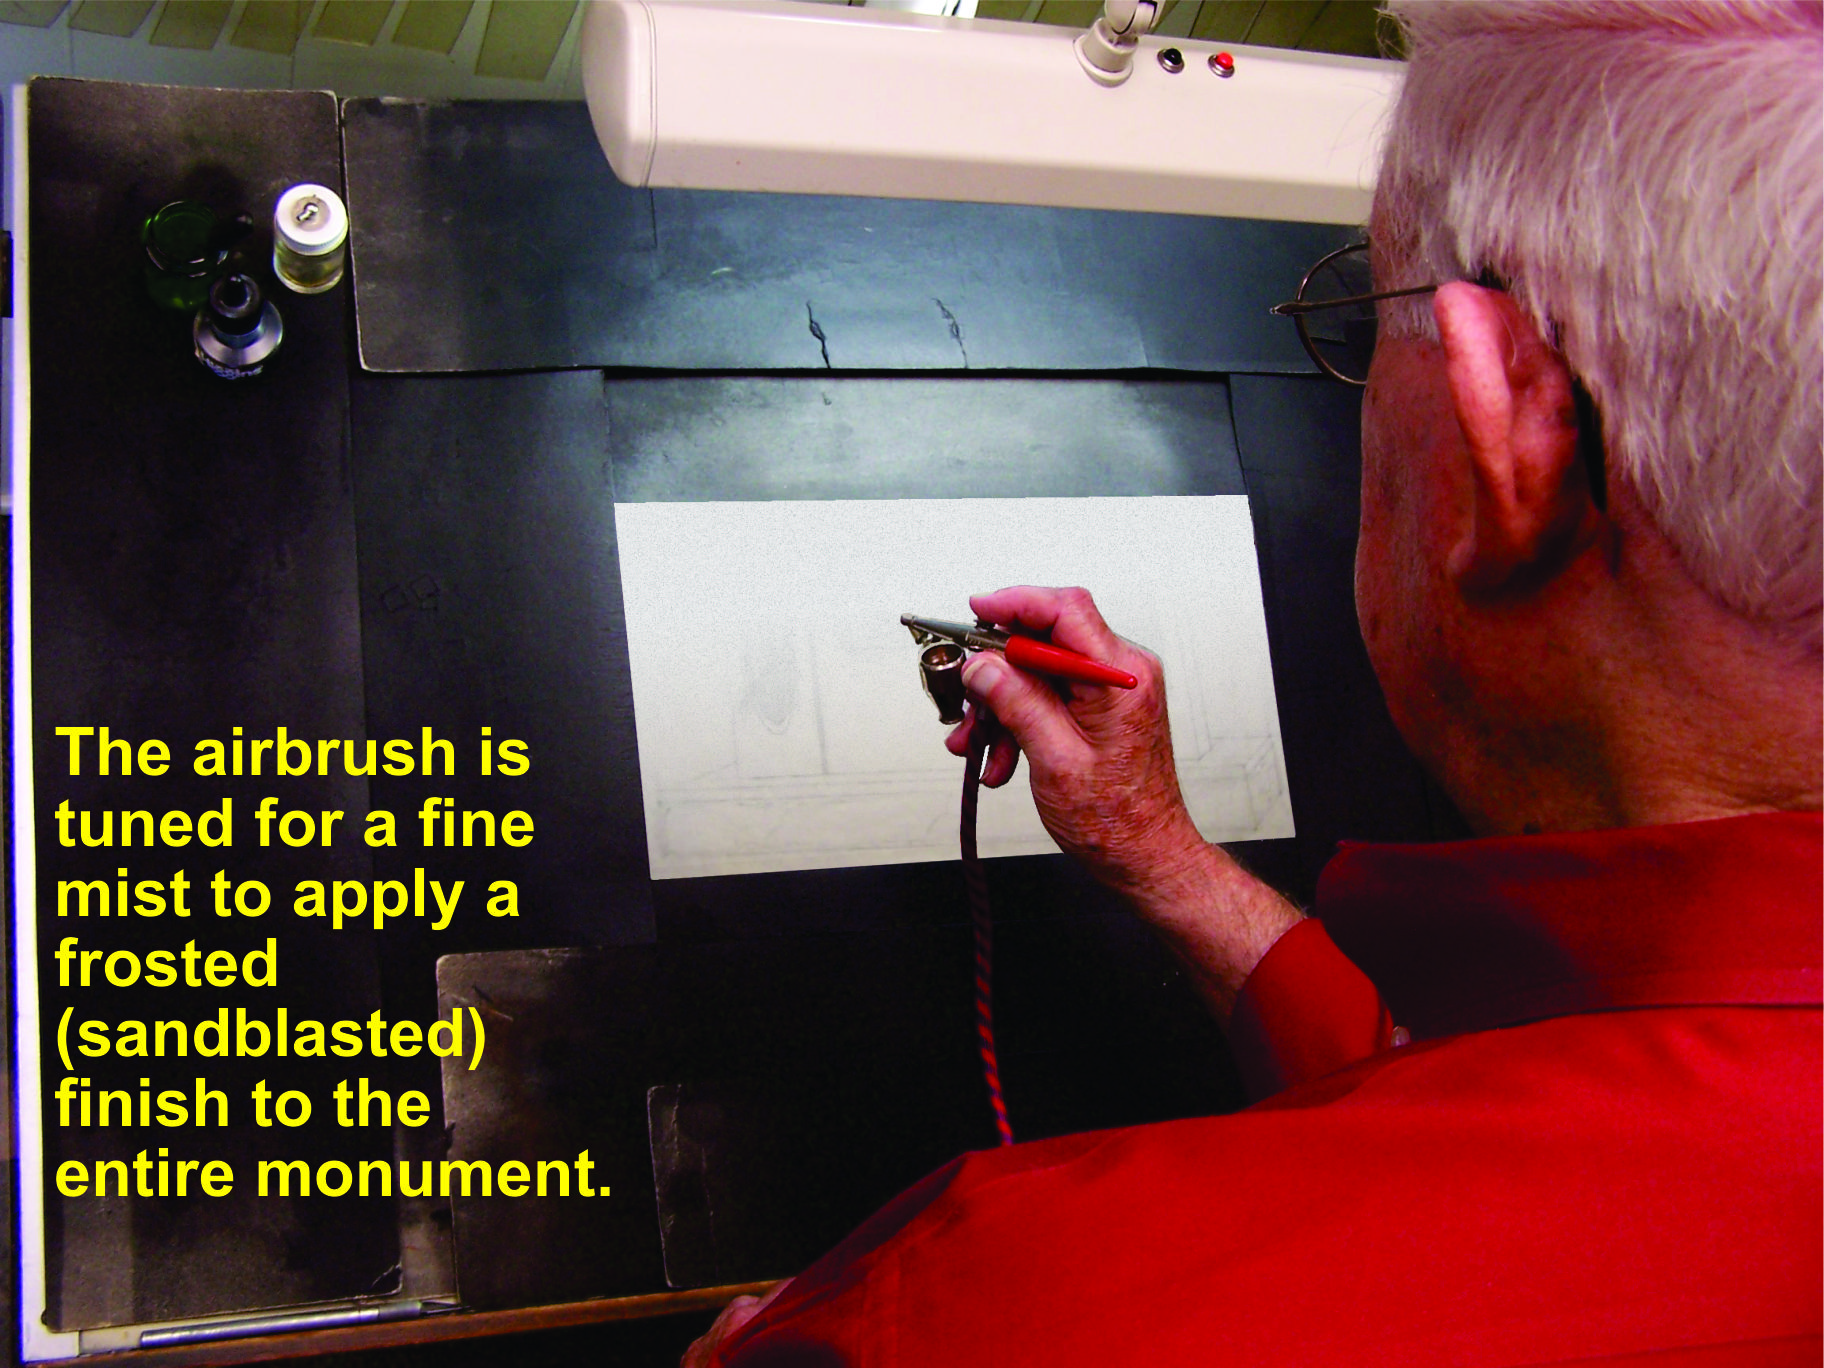
Two different Paasche airbrushes are used. The first one is set to produce a fine mist to simulate the frosted surface of the granite. This is applied to panels, flowers, etc.
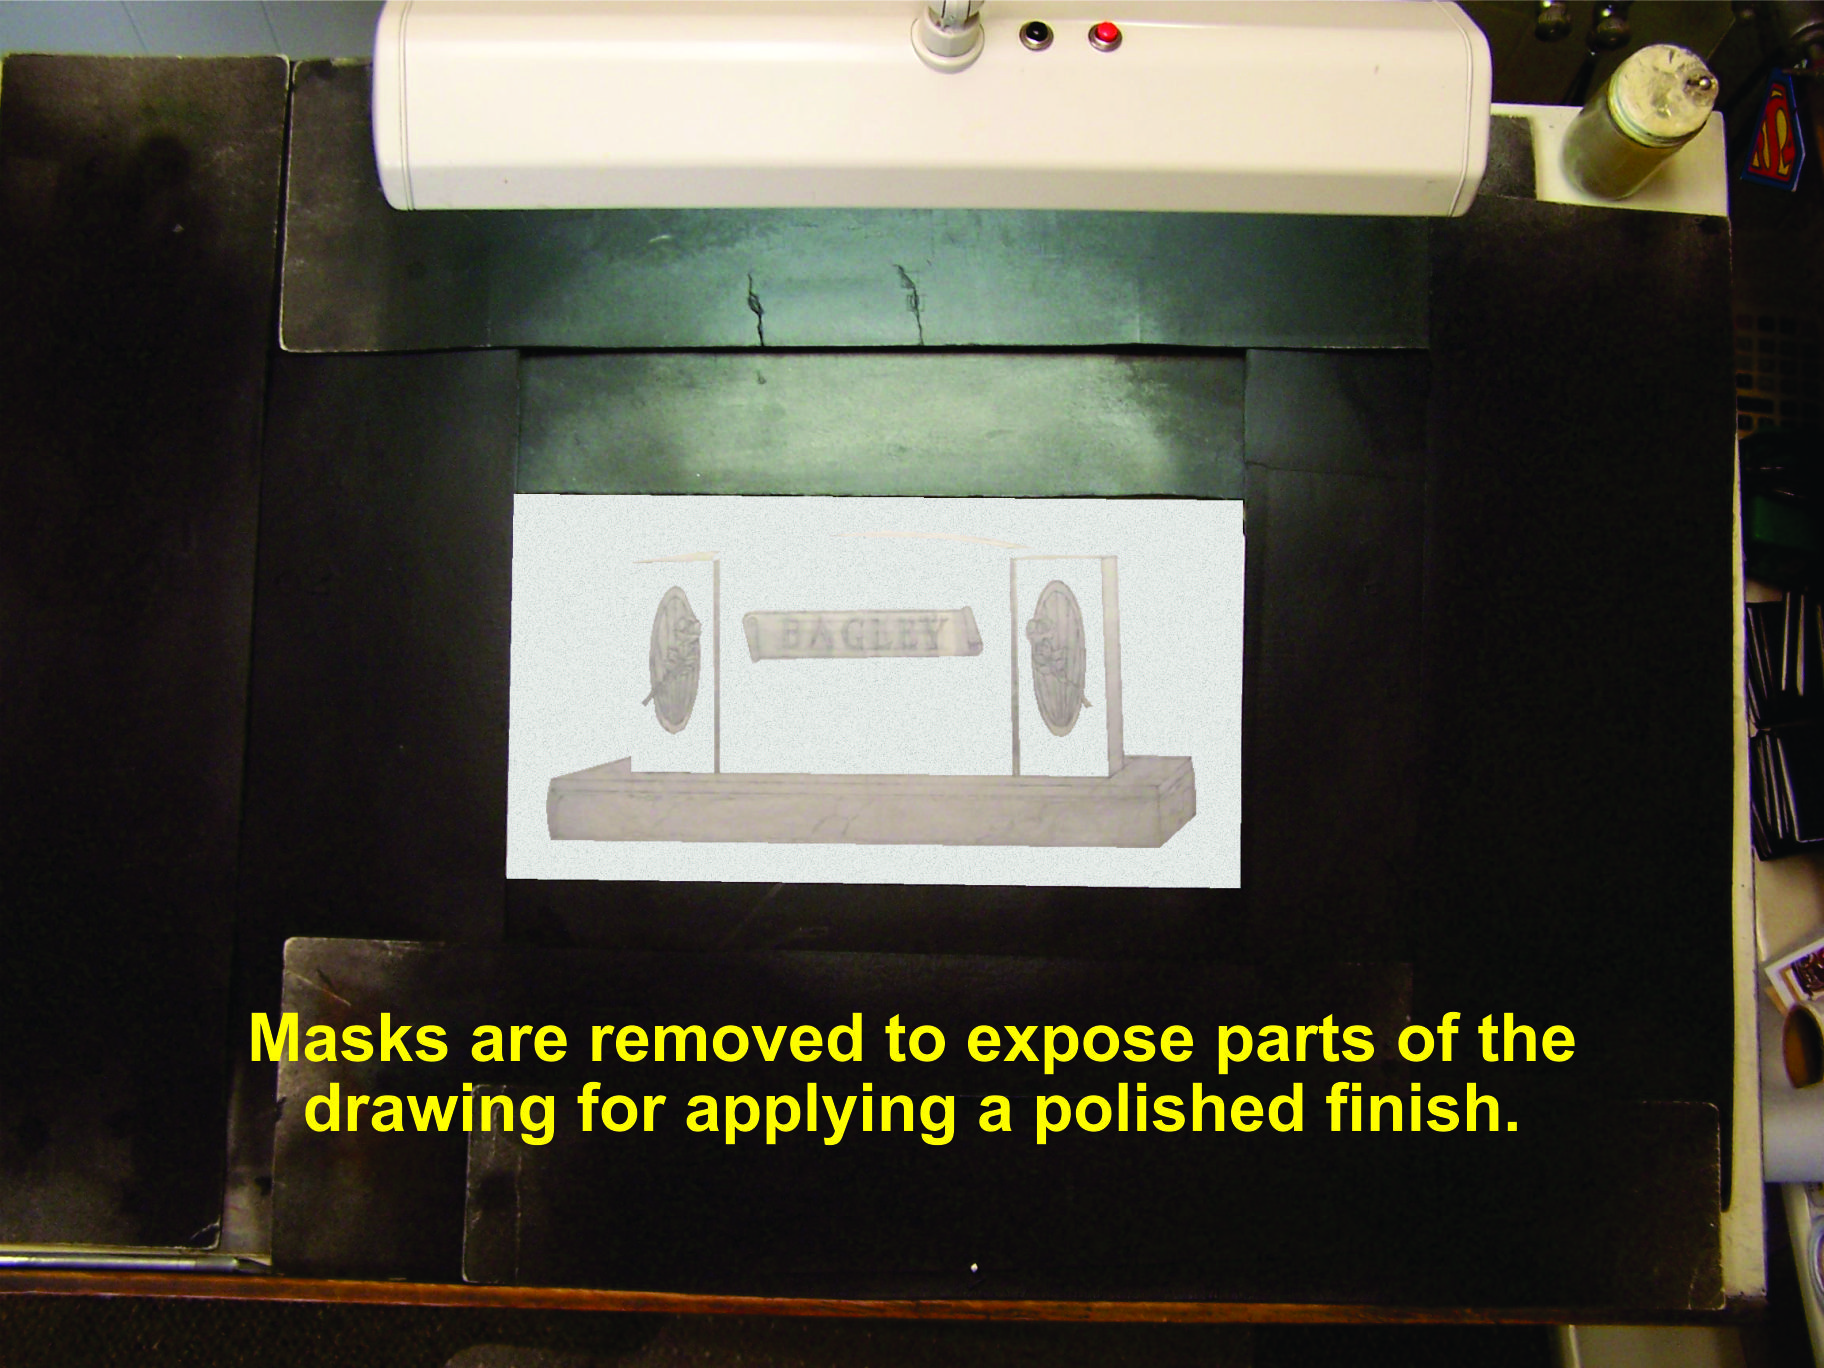
Masks are applied to portions of the drawing where frost needs to be protected and no polish applied.
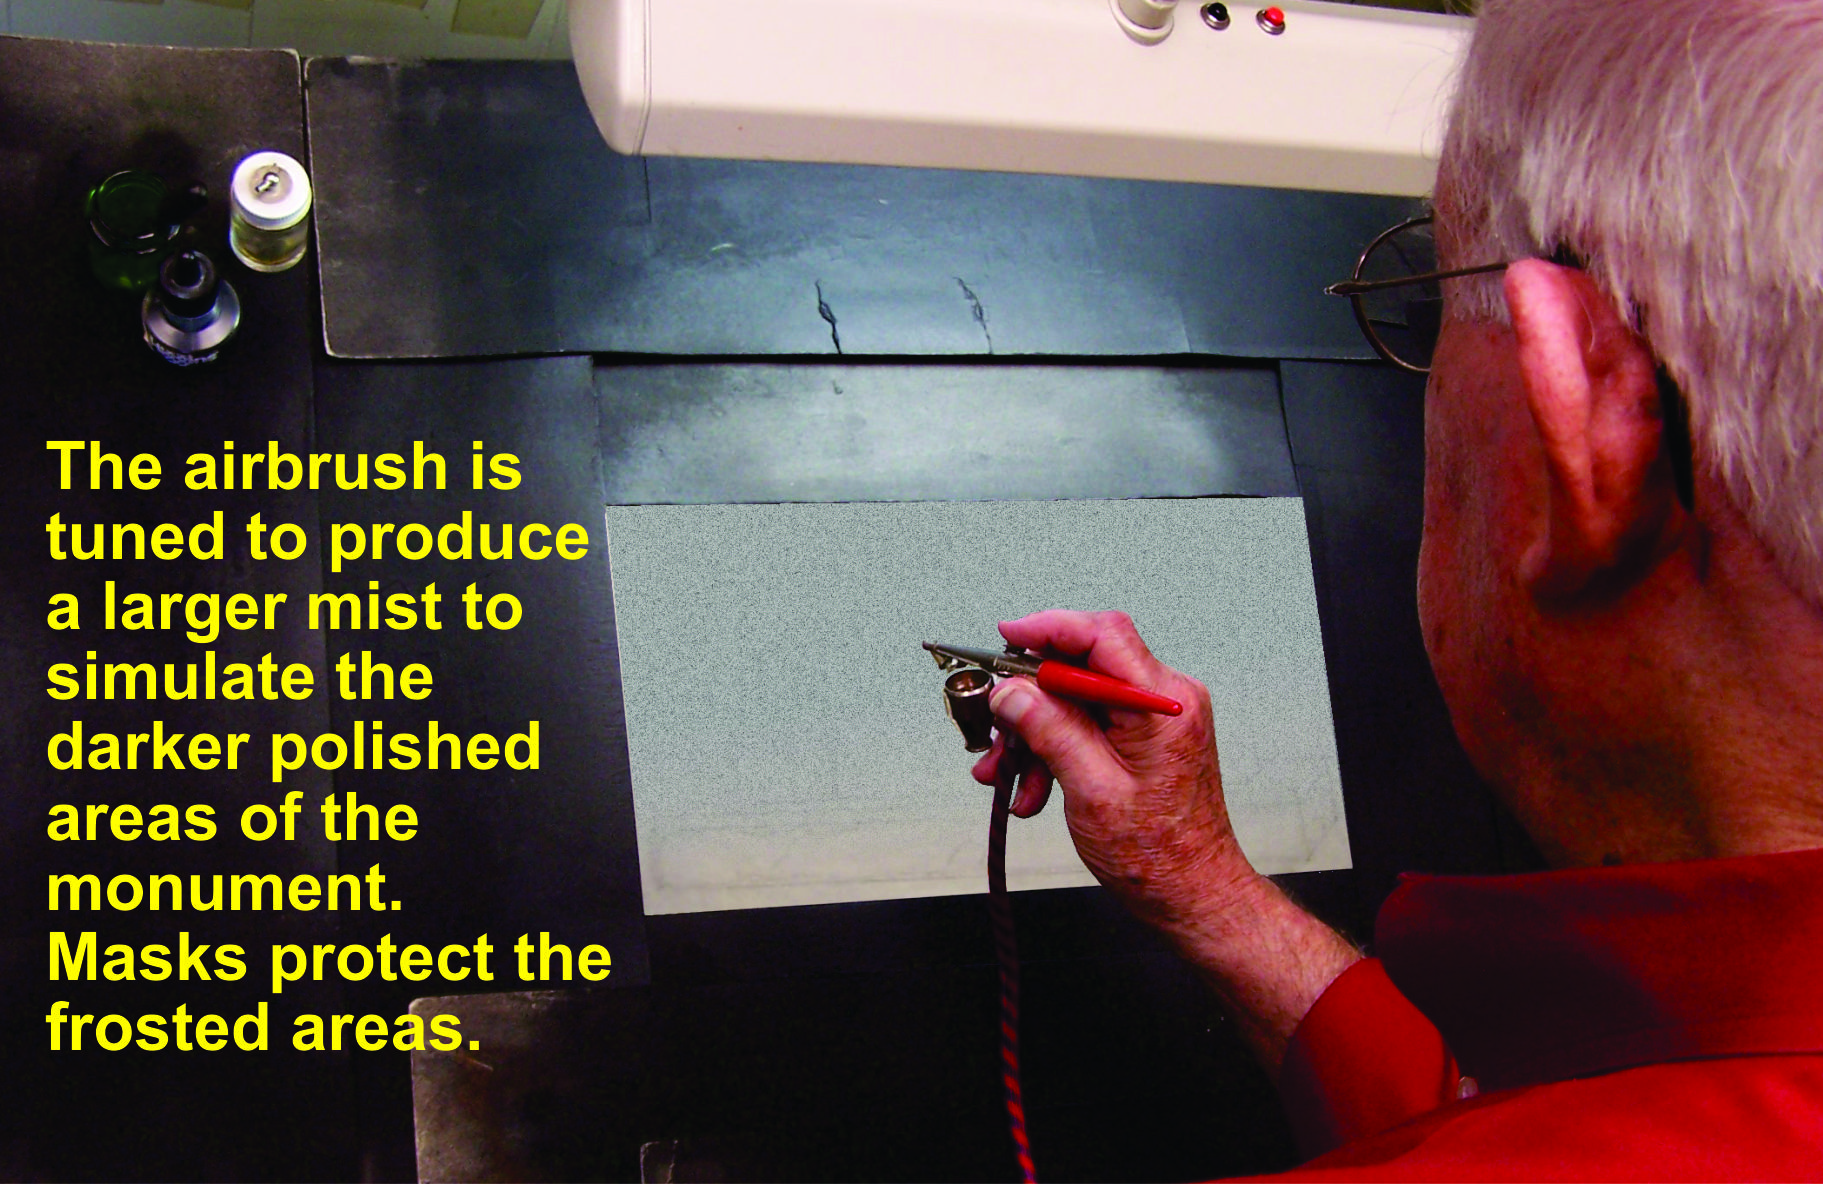
The second Paasche airbrush is tuned for larger dots of ink, which simulate the darker polished finish of the monument.
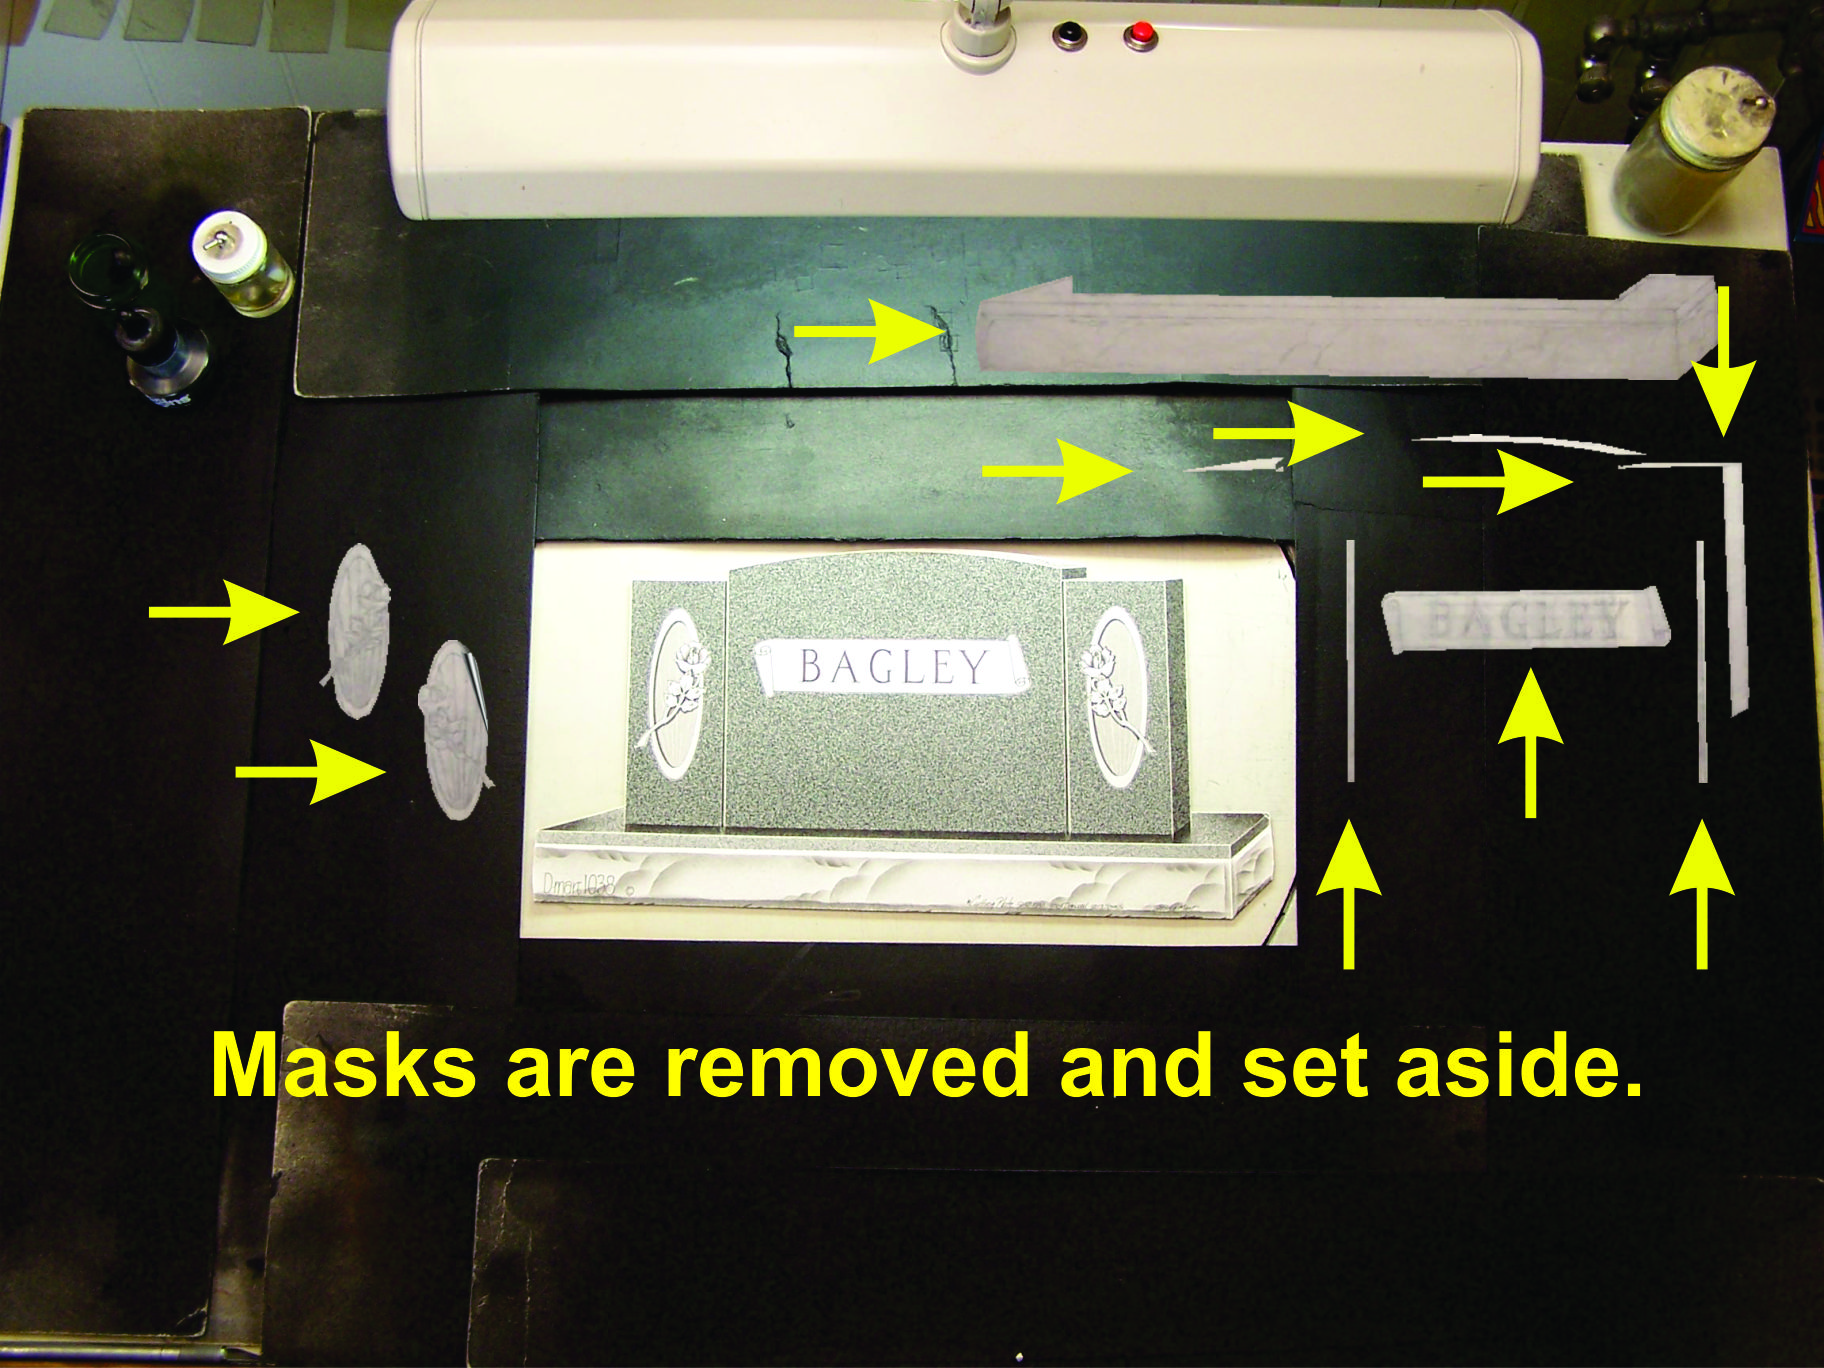
Masks are kept briefly while touch-up work is done. There's always a chance a mask may need to be placed back in position for additional airbrushing.
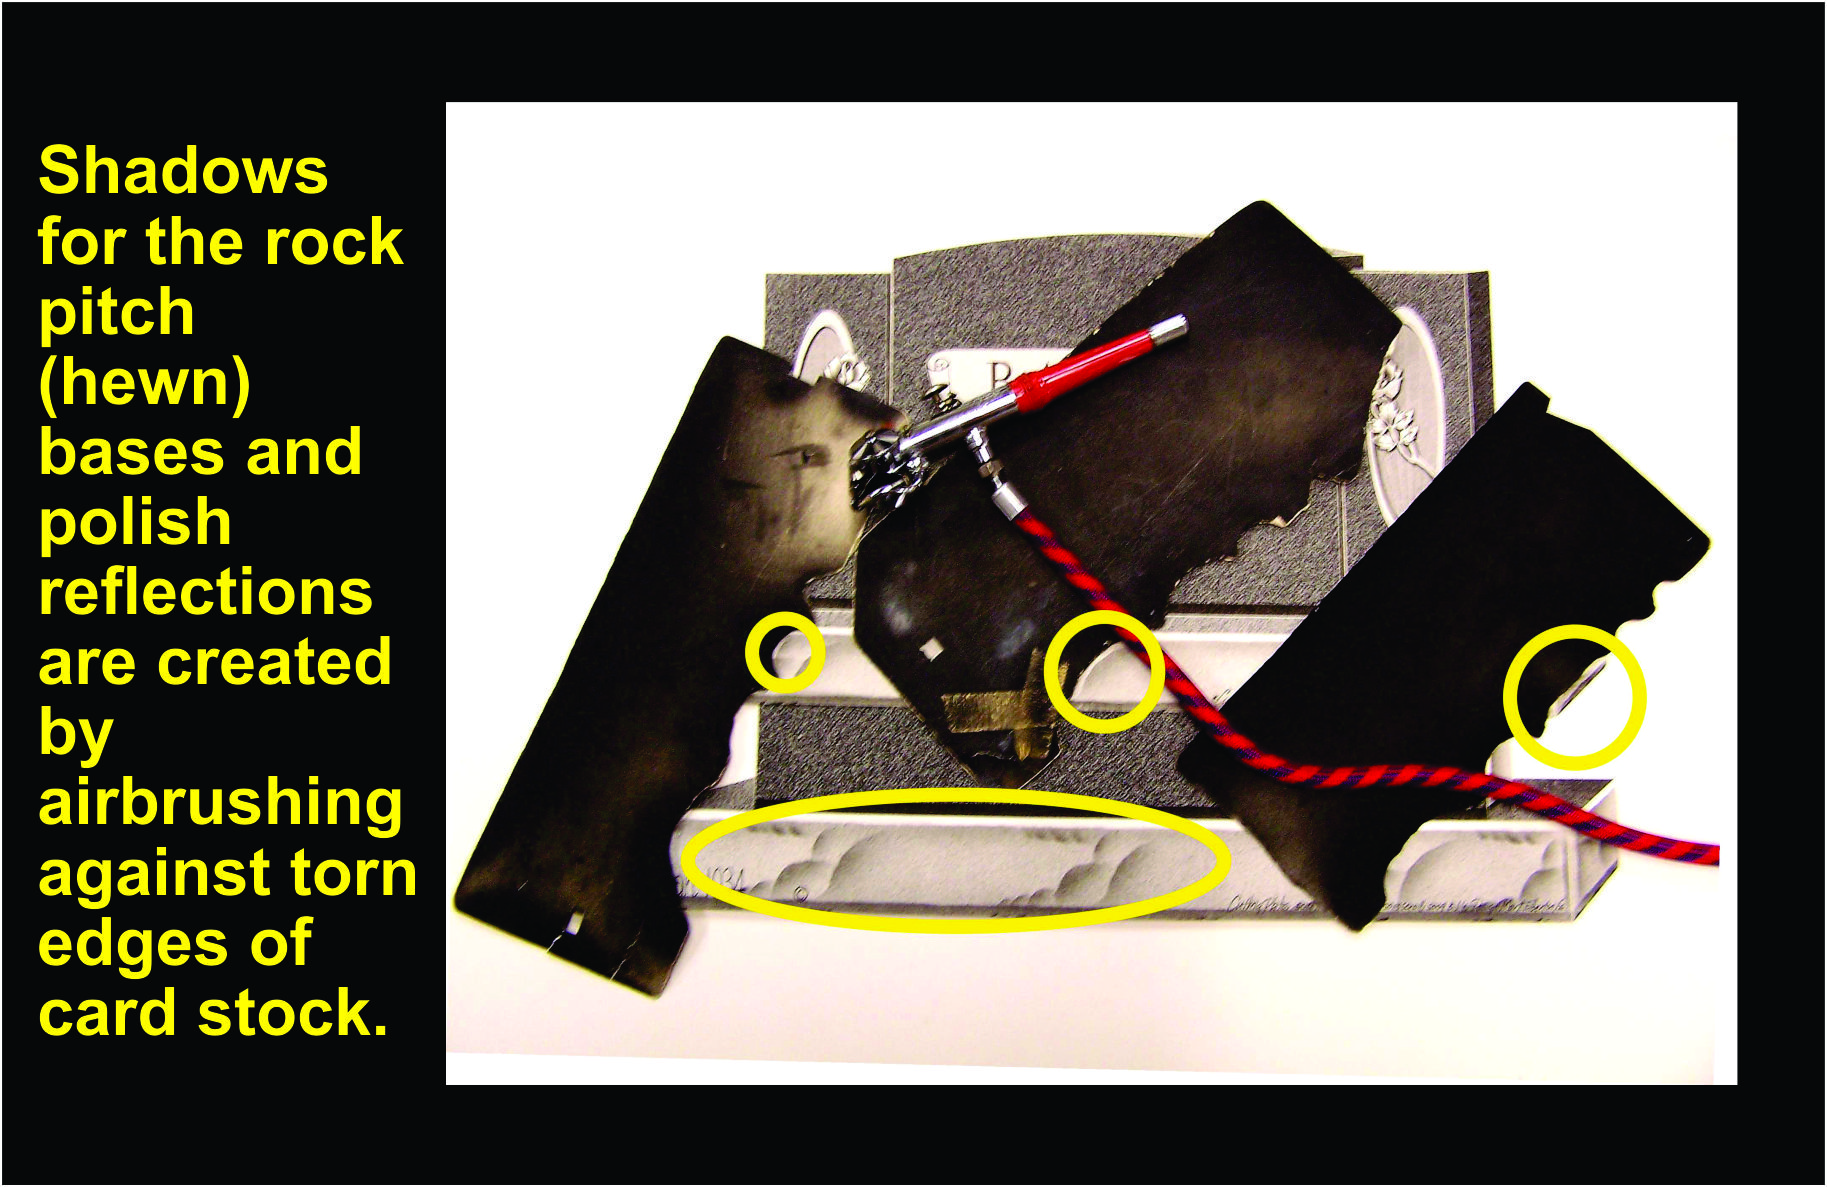
Bits are torn out of thick card stock and a fine mist is sprayed against the edges to simulate the rock pitch or hewn front edge of a base. These pieces of paper have been used since Design Mart opened in 1969.
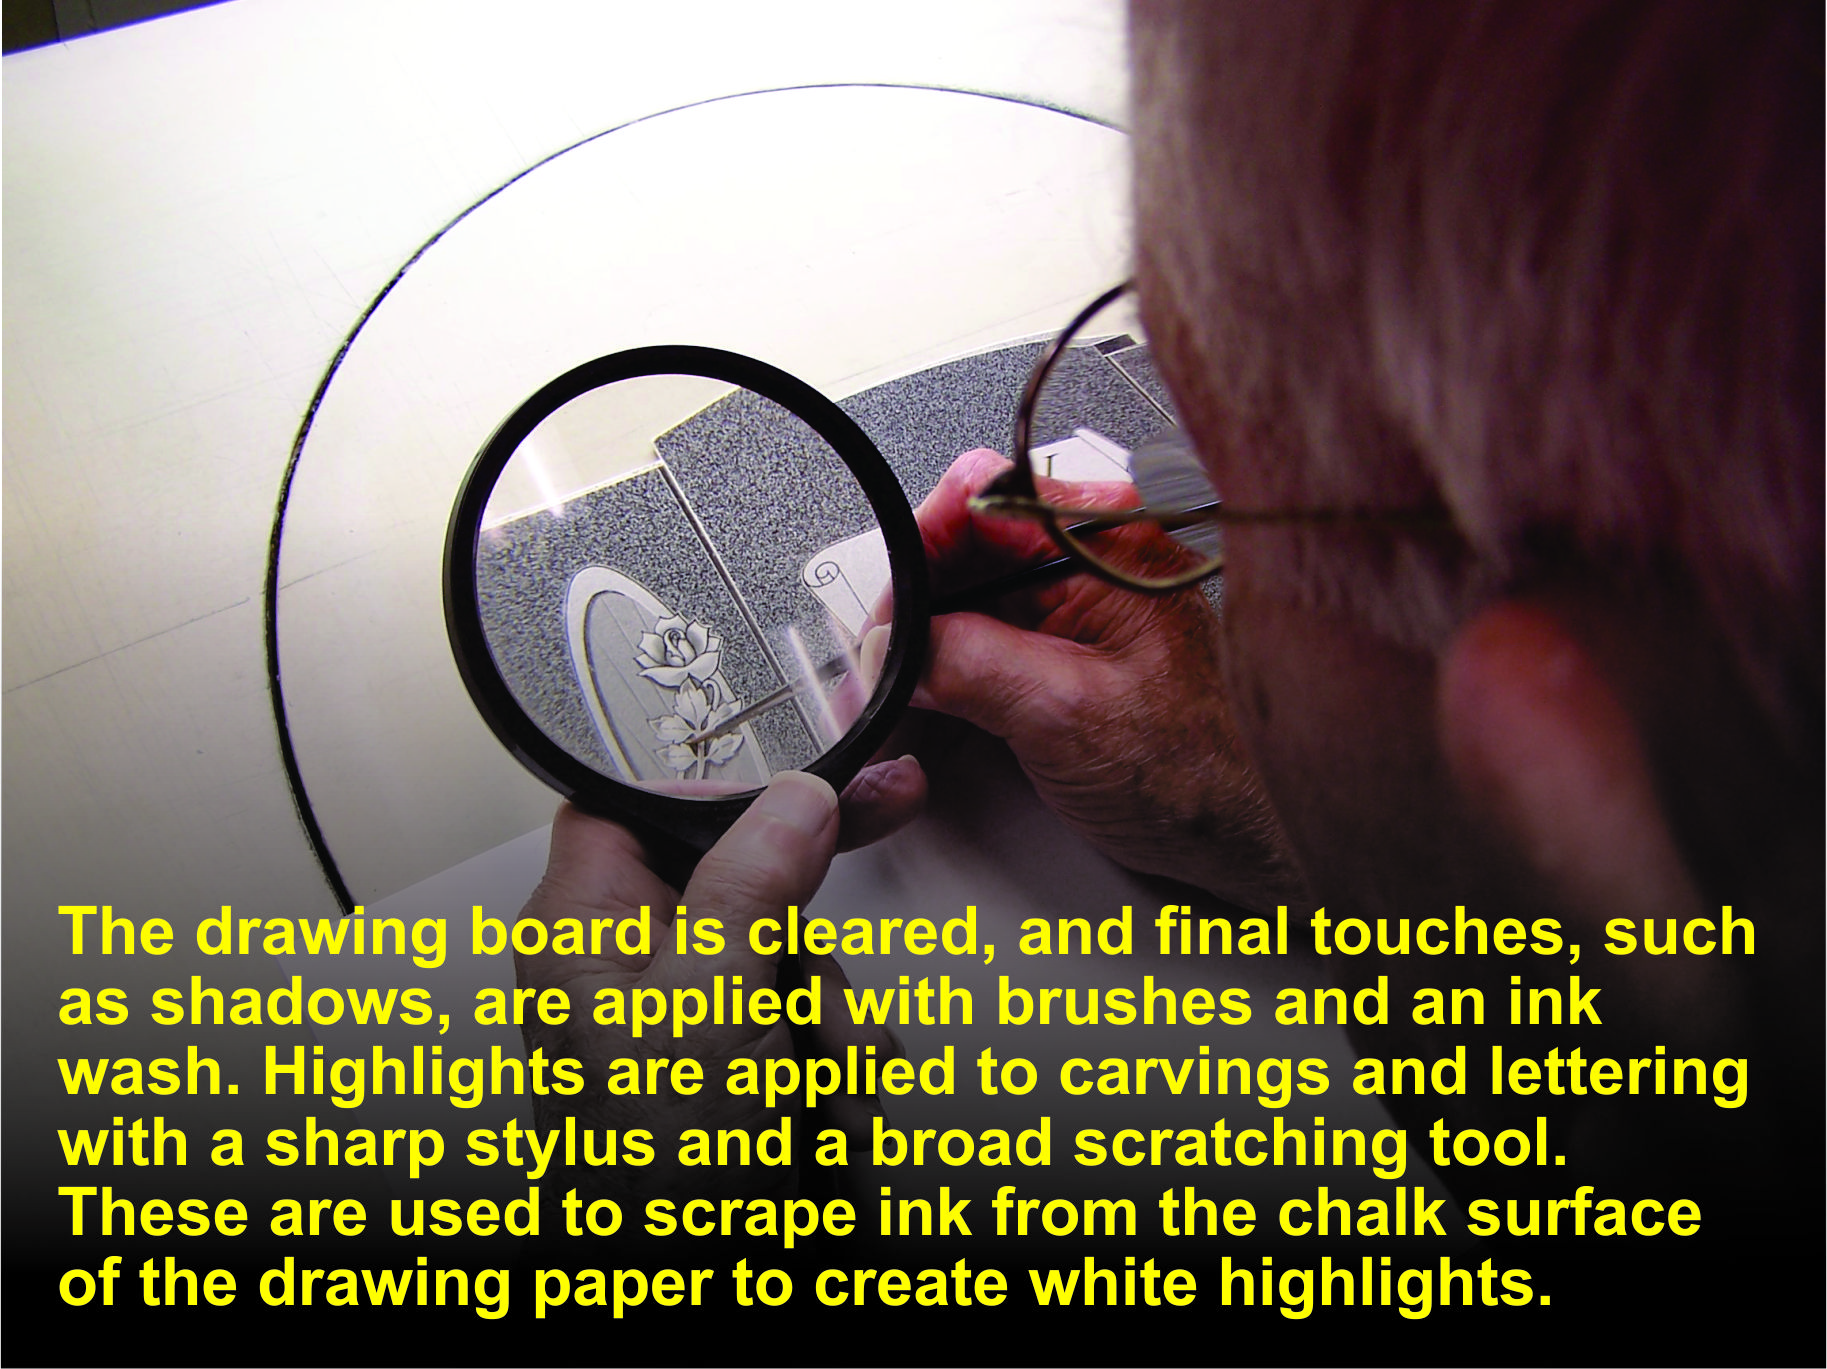
In the final steps, shadows are applied with an ink wash and a tiny brush. Highlights are applied by scratching ink off of the chalk scratchboard to reveal white underneath. Sharp lines, such as the edges of letters, were done with a stylus, while larger areas such as leaves and flower petals were scratched with a broader scratcher with tiny teeth or serration. Both tools were handmade by Joe Fernandez from used dental drill bits. Because the steel was good quality, the tools could be used for years with no sharpening required.

A coat of transparent "fixative" was applied to help resist fingerprints, and protect the drawing from scratches.
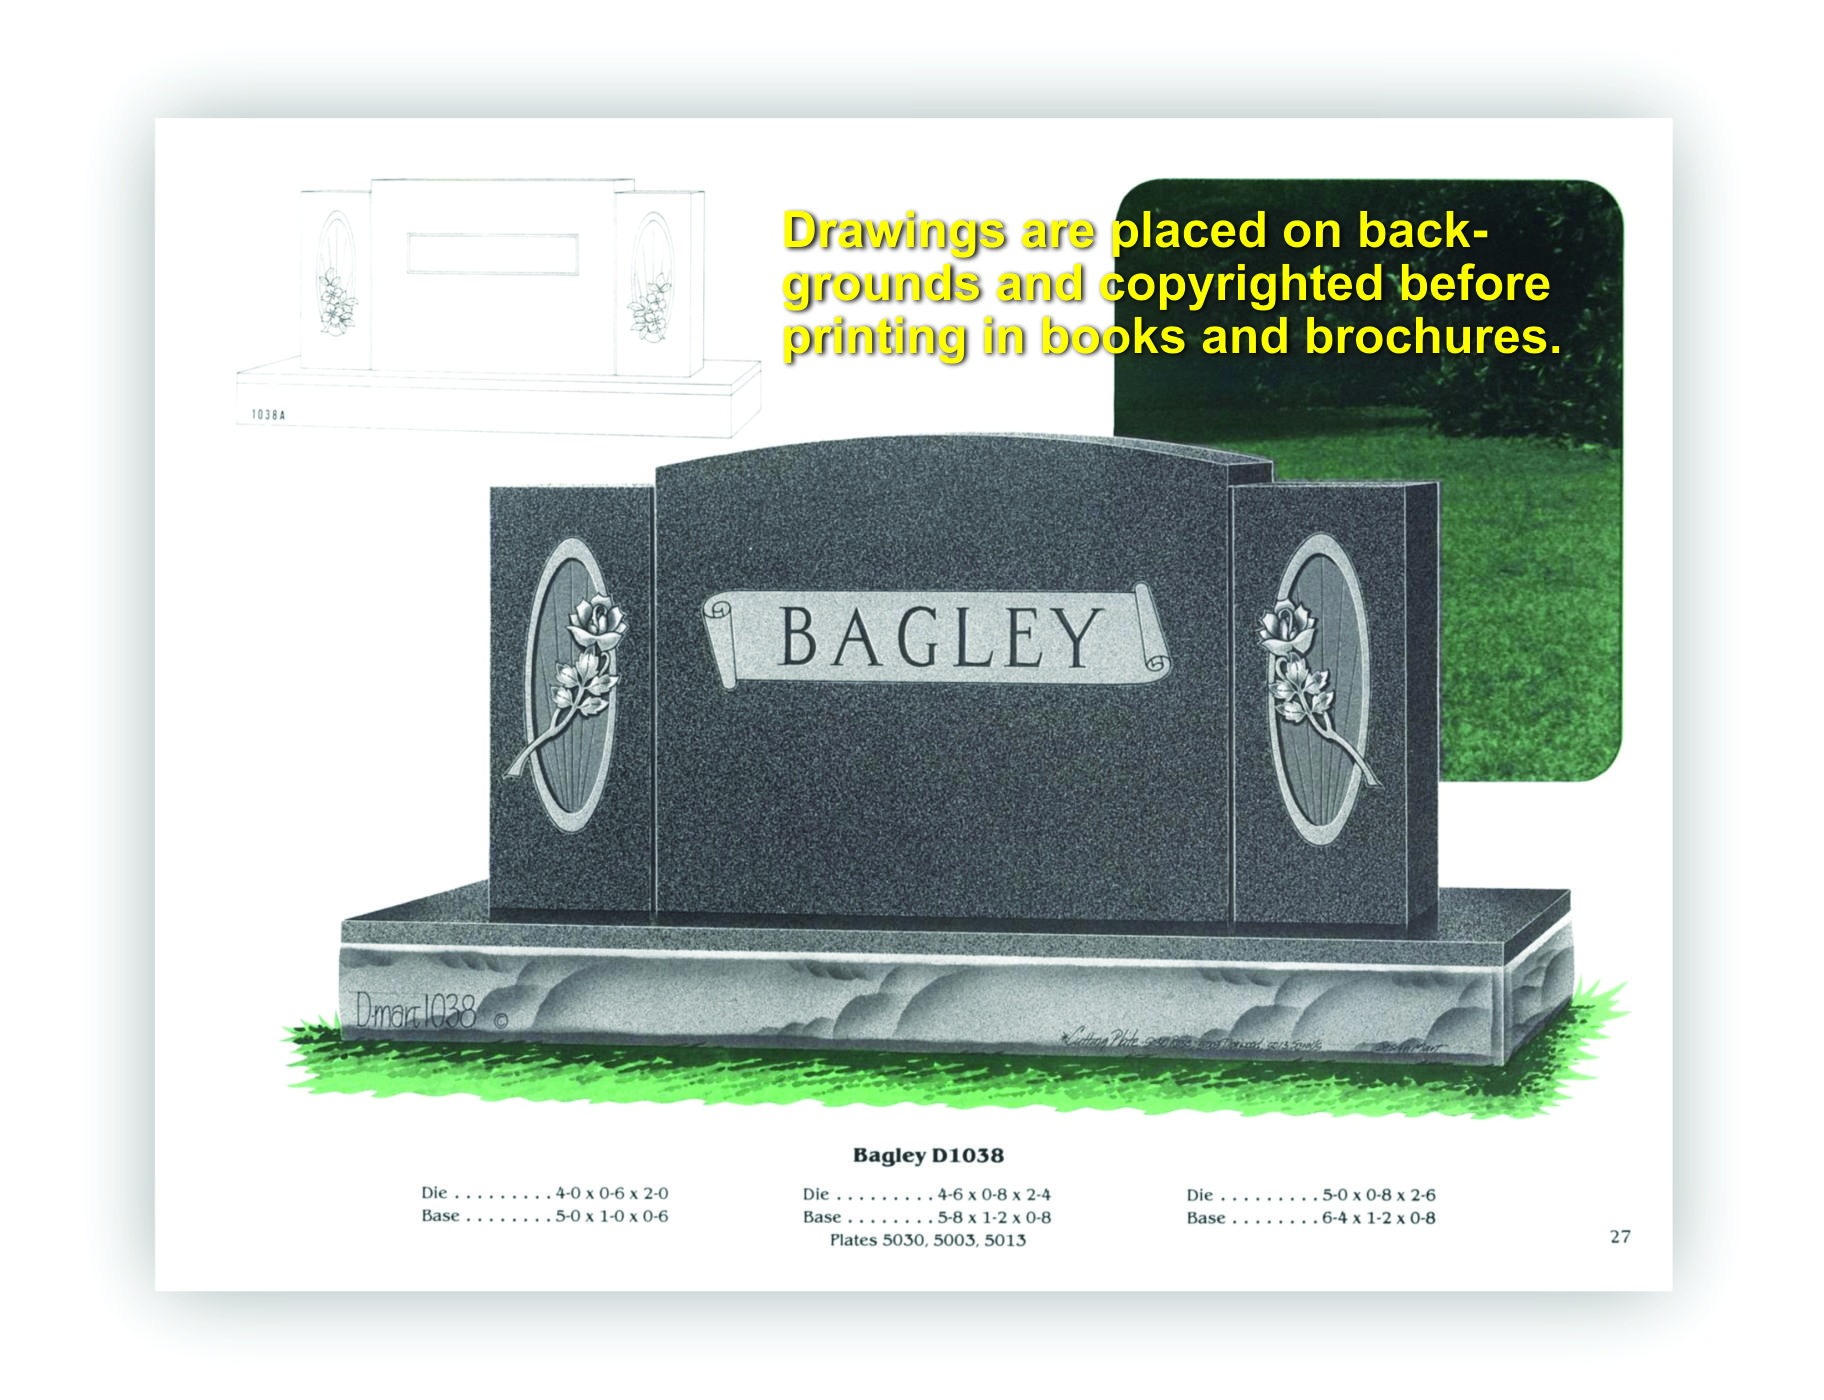
Drawings weren't placed on full backgrounds like those from other artists. Joe always believed the background shouldn't take away from the monument itself. Most drawings had alternate drawings shown in the top left corner. These alternates often used the same flowers, but were shown in a different way. Each drawing had an identification number applied, and standard flowers and panels had numbers as well. These identification numbers as well as the copyright indicia were placed on the bottom right side of the base, while the DMart identification number was always placed on the botton left corner of the base.